Oshozan-u Shrine location and walkthrough in Zelda: Tears of the Kingdom
How to complete the Oshozan-u Shrine Shrine in Zelda: Tears of the Kingdom, including its location and the full “Mallet Smash” puzzle solution.
This article references relevant content from the polygon.com website. Original article link: [https://www.polygon.com/zelda-tears-of-the-kingdom-guide/23754275/oshozan-u-shrine-mallet-smash-puzzle-solution-location-walkthrough]
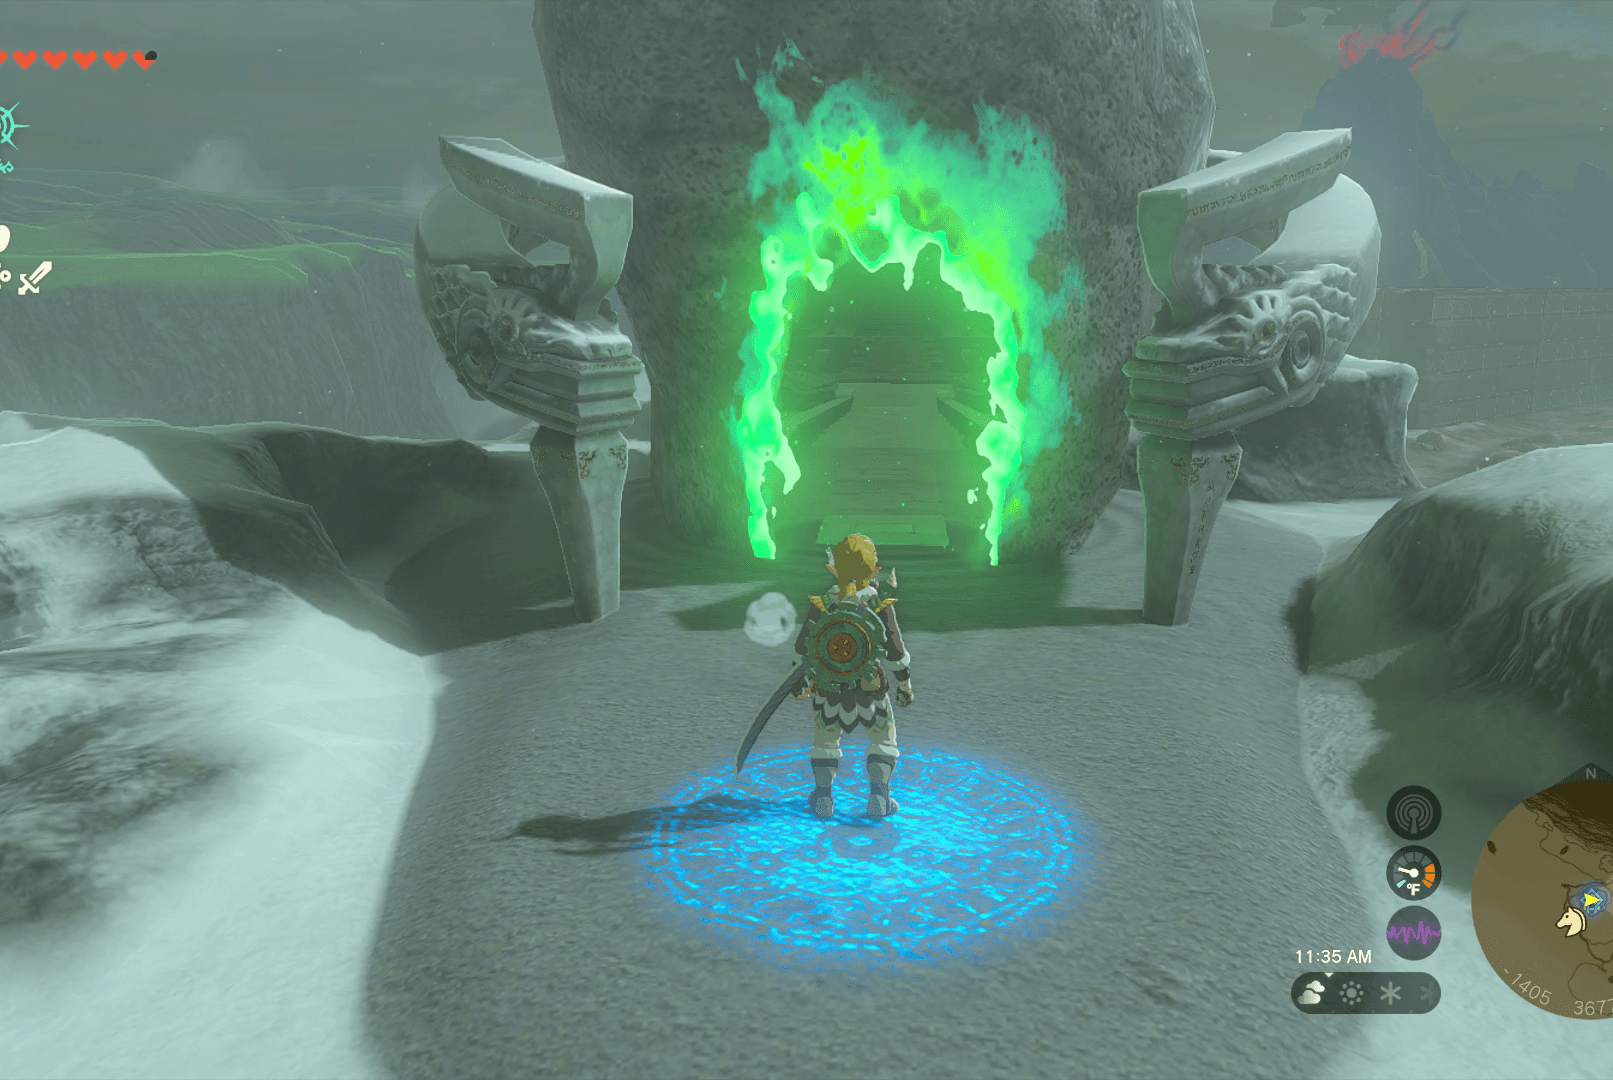
Oshozan-u Shrine is a shrine within The Legend of Zelda: Tears of the Kingdom’s Hebra Mountains region.
Our guide will help you find the Oshozan-u Shrine location, solve its puzzles, and walk you through the “Mallet Smash” challenge to collect the chest and Light of Blessing.
When you’re done, our shrine locations page or interactive Hyrule map can direct you toward something else to do.
Oshozan-u Shrine location
The Oshozan-u Shrine is found within the Hebra Mountains region. Its exact coordinates are (-1404, 3677, 0288).
This shrine is on a hilltop, although it’s not a super-tall one. You can climb it if you’ve got the stamina (and cold-weather wear like the Snowquill Armor set) for the task. We opted to light a fire and throw in a Hylian pine cone, using the upward gust to paraglide up to the shrine’s entrance.
Oshozan-u Shrine walkthrough
As the puzzle name “Mallet Smash” suggests, you’ll need to construct a big mallet to hit a target in order to solve this shrine. Oshozan-u Shrine provides Link with a few tools to get the job done.
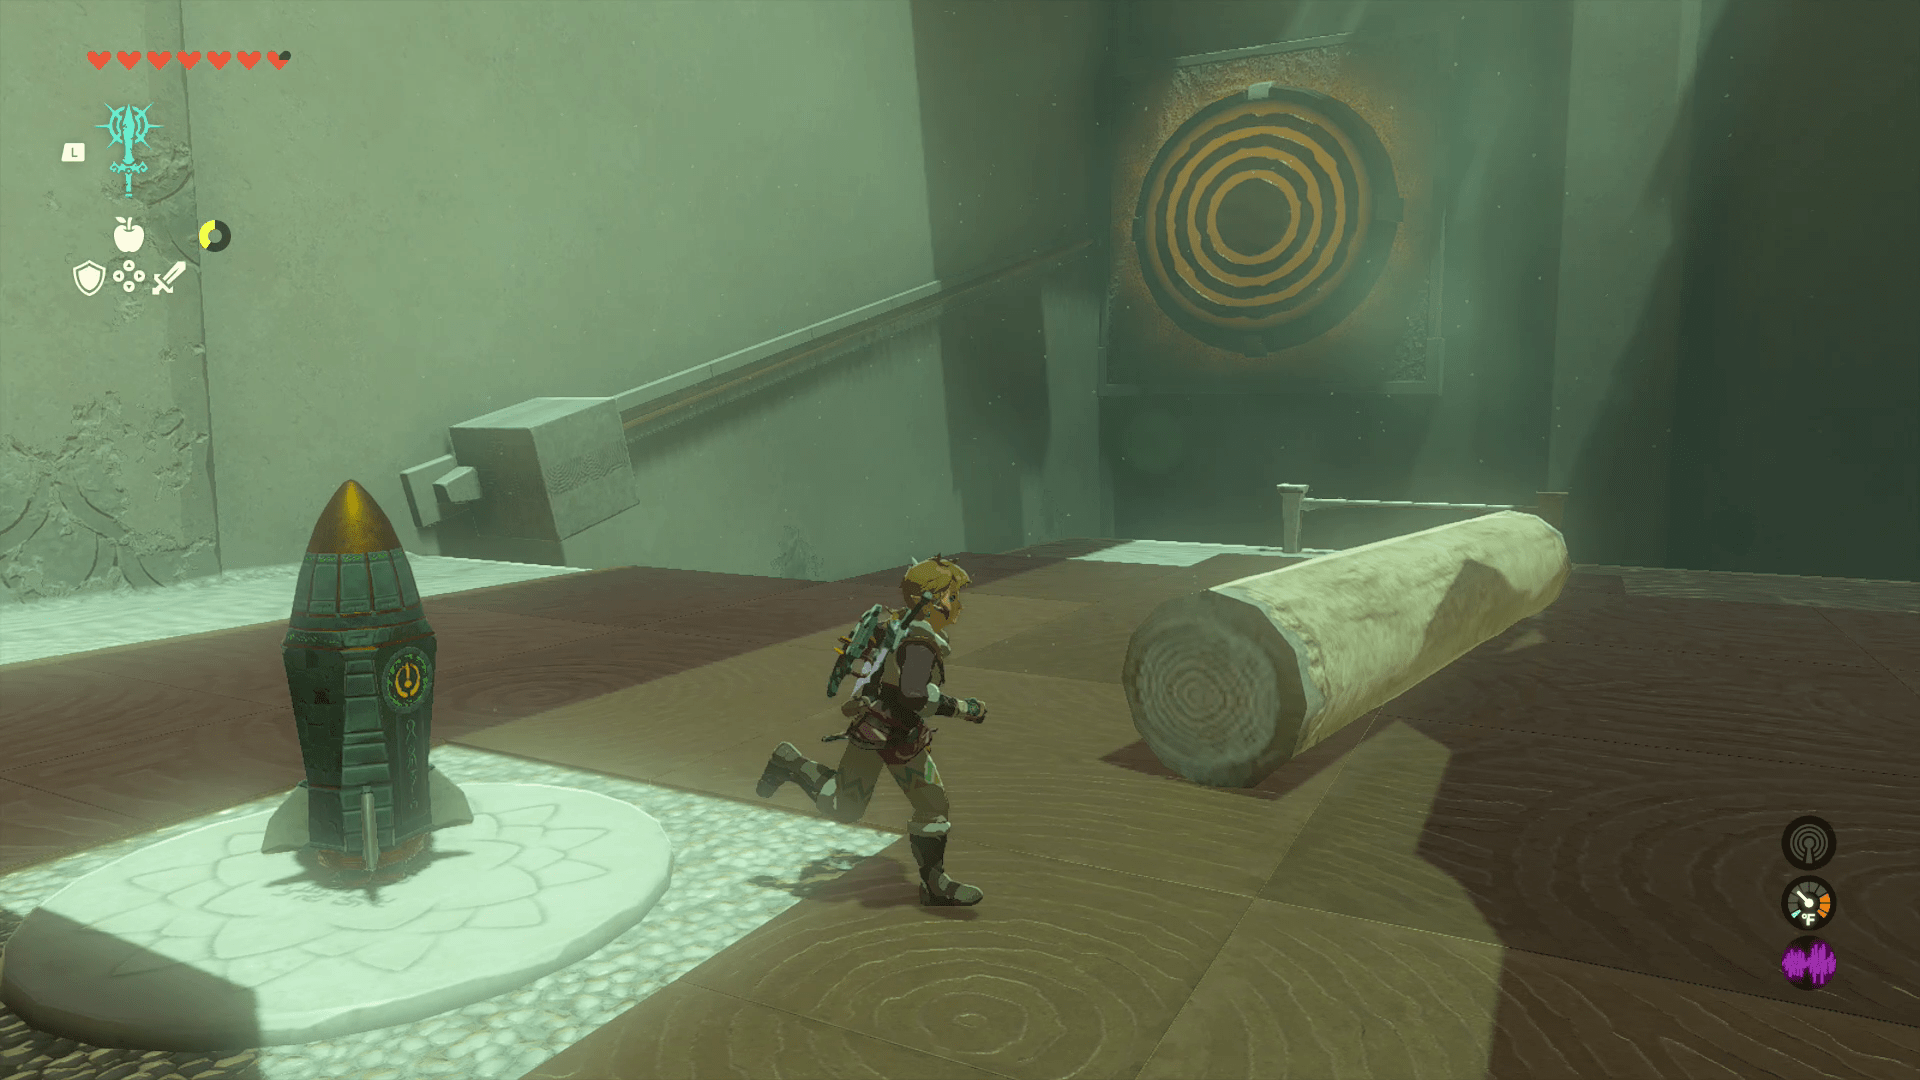
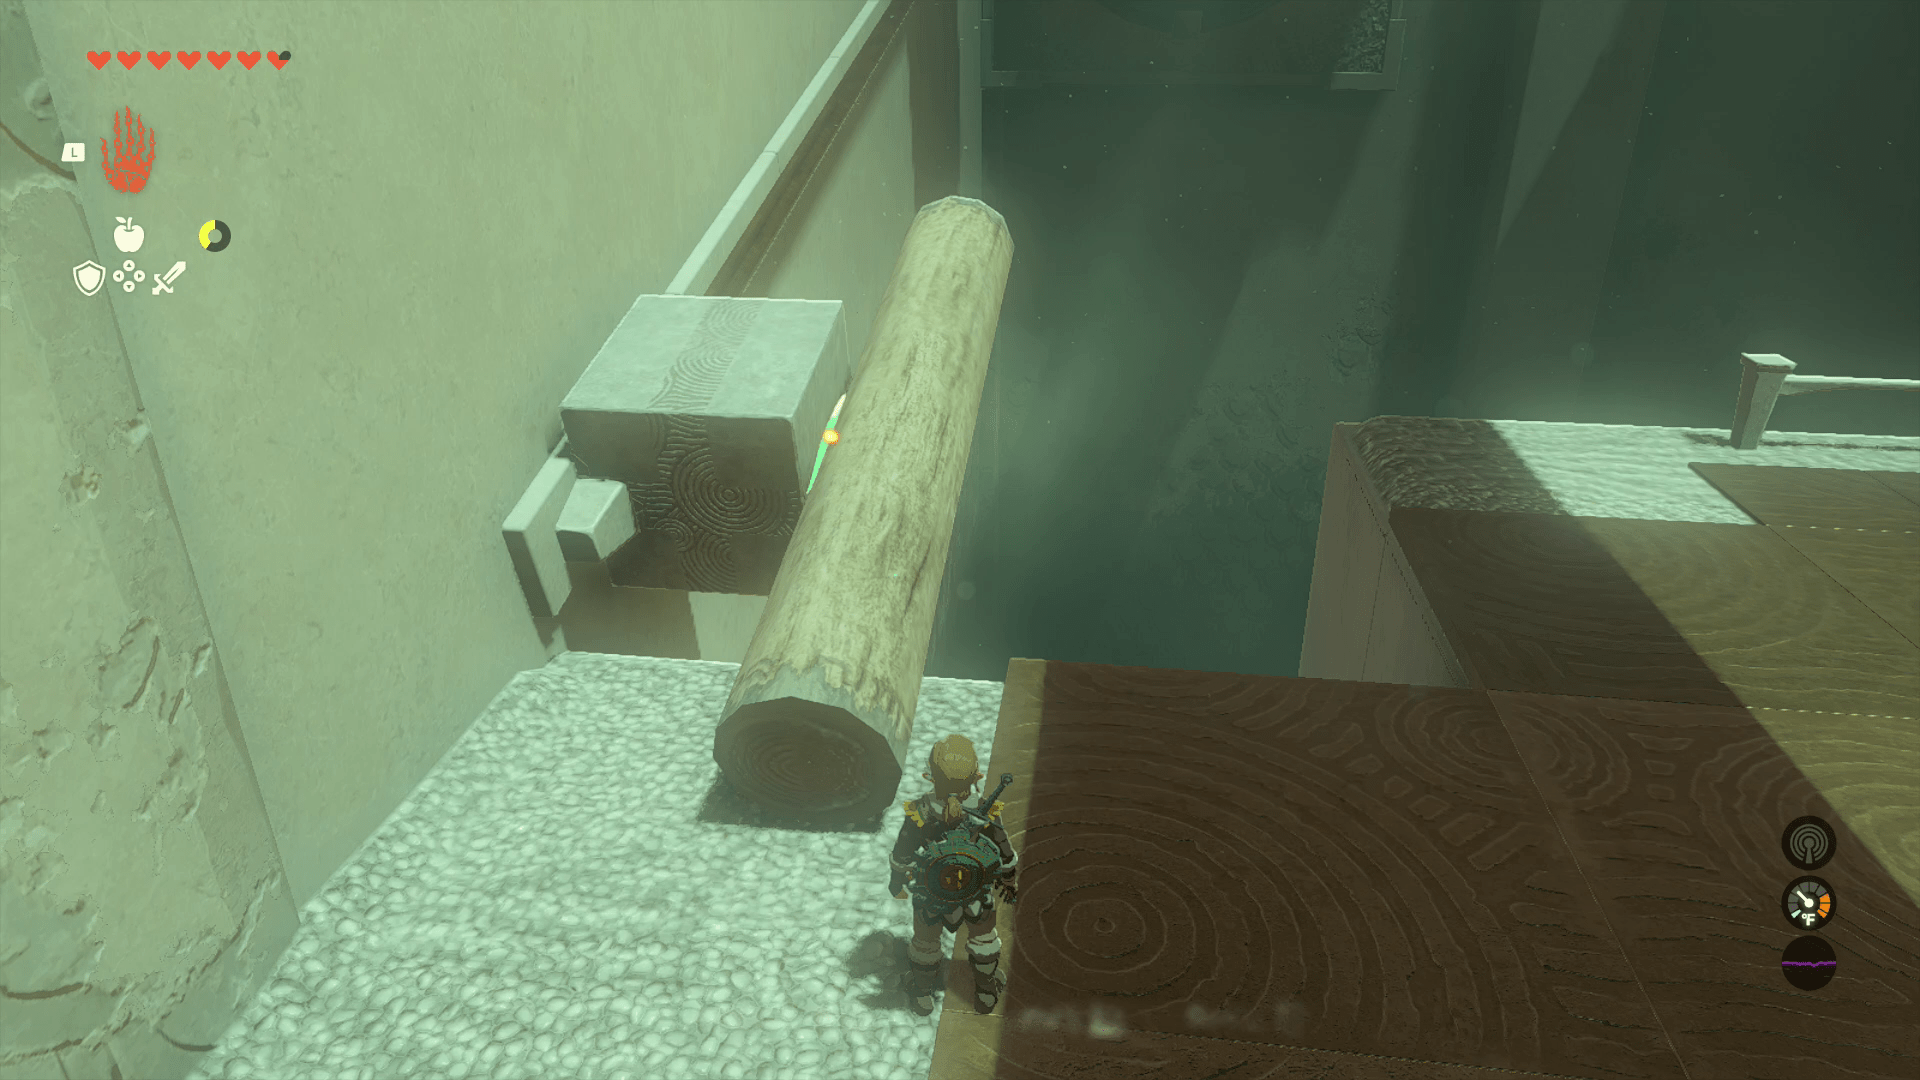
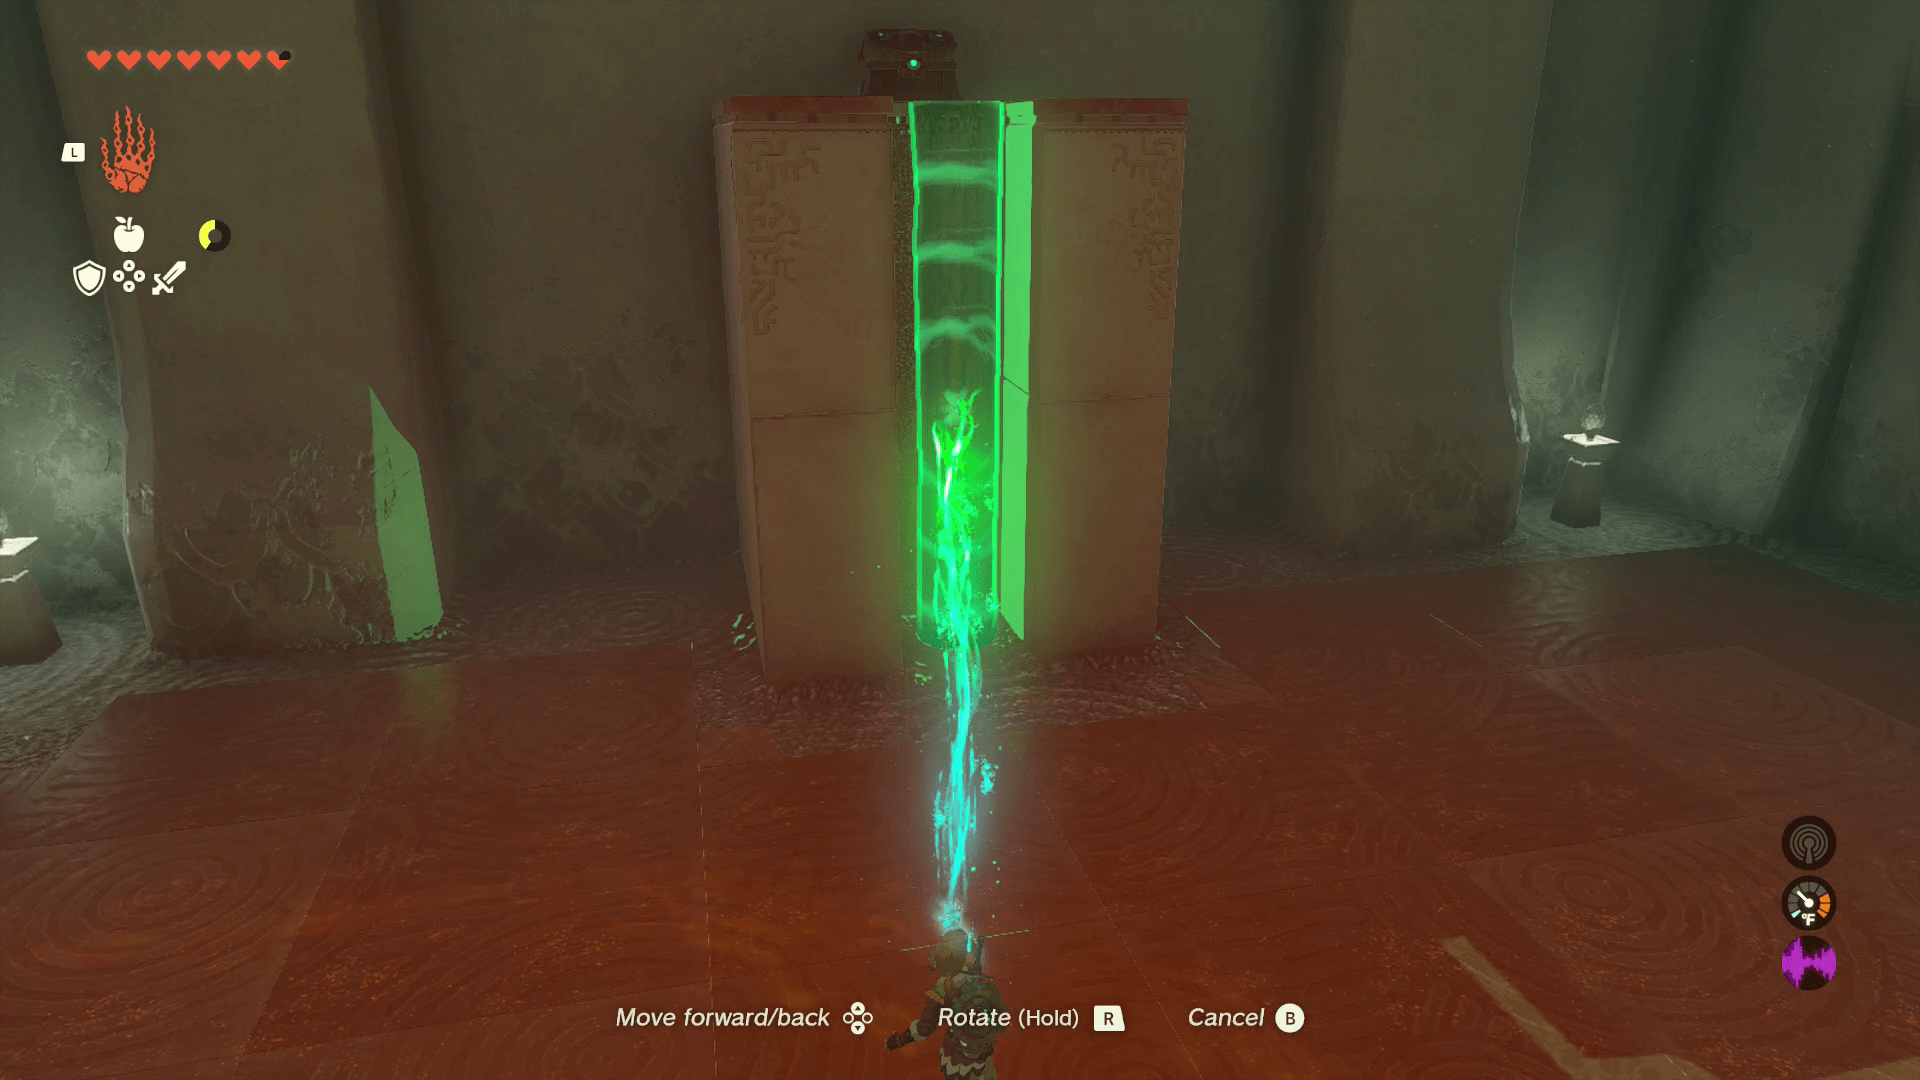
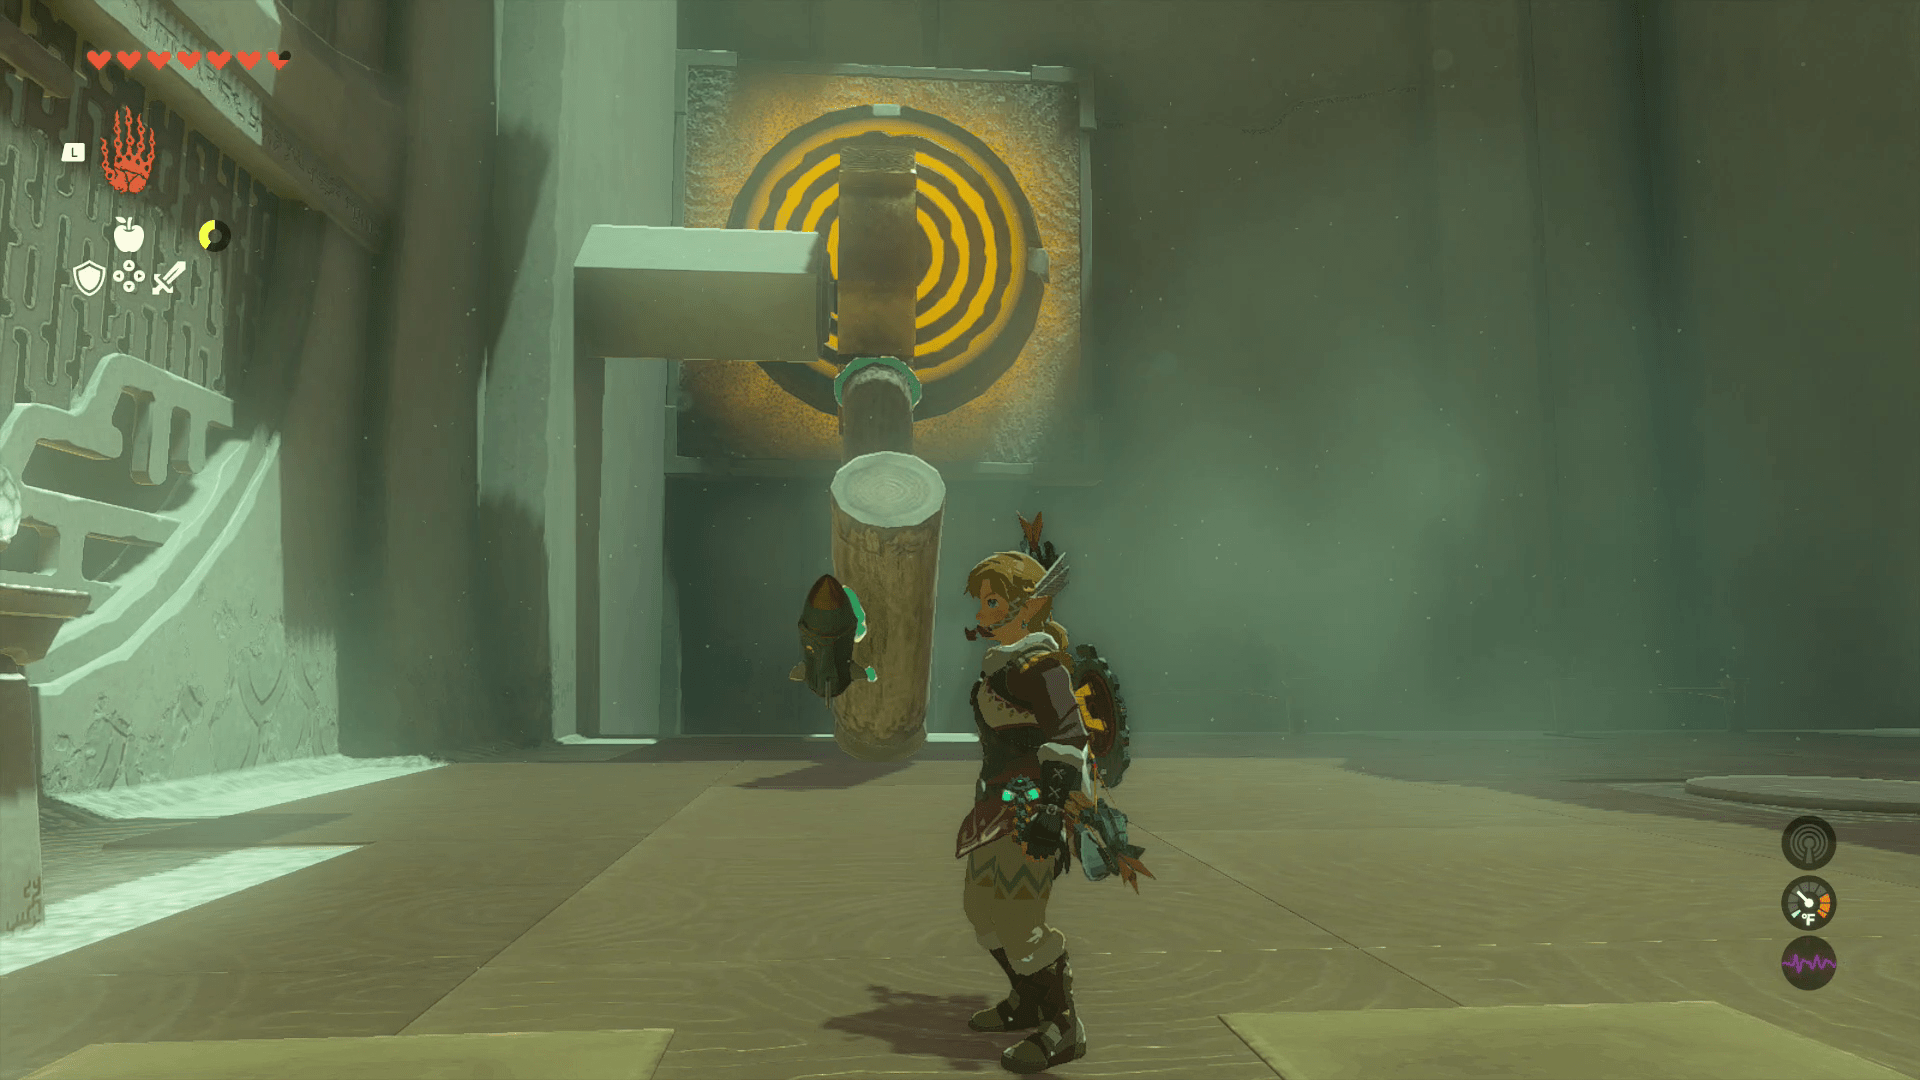
1. Walk down the steps into the first cavern. There are no enemies here — just some objects to use for solving this puzzle. There’s a wooden log and a rocket Zonai device on the ground. On the back wall, there’s a stone block affixed to a sliding track that aims towards a big yellow target on the adjacent wall.
2. Use Ultrahand to attach the log to the stone on the sliding track. You’ll want to angle the log so that one end of it is aimed towards the yellow target. Check out our picture for reference if you can’t figure out the right angle.
3. Use Ultrahand to pick up the rocket, and attach it to the back end of the log.

4. Hit the rocket to light it up, and watch the log shoot into the target. Once it hits, a gated doorway behind you will unlock. Head into the next cavern.
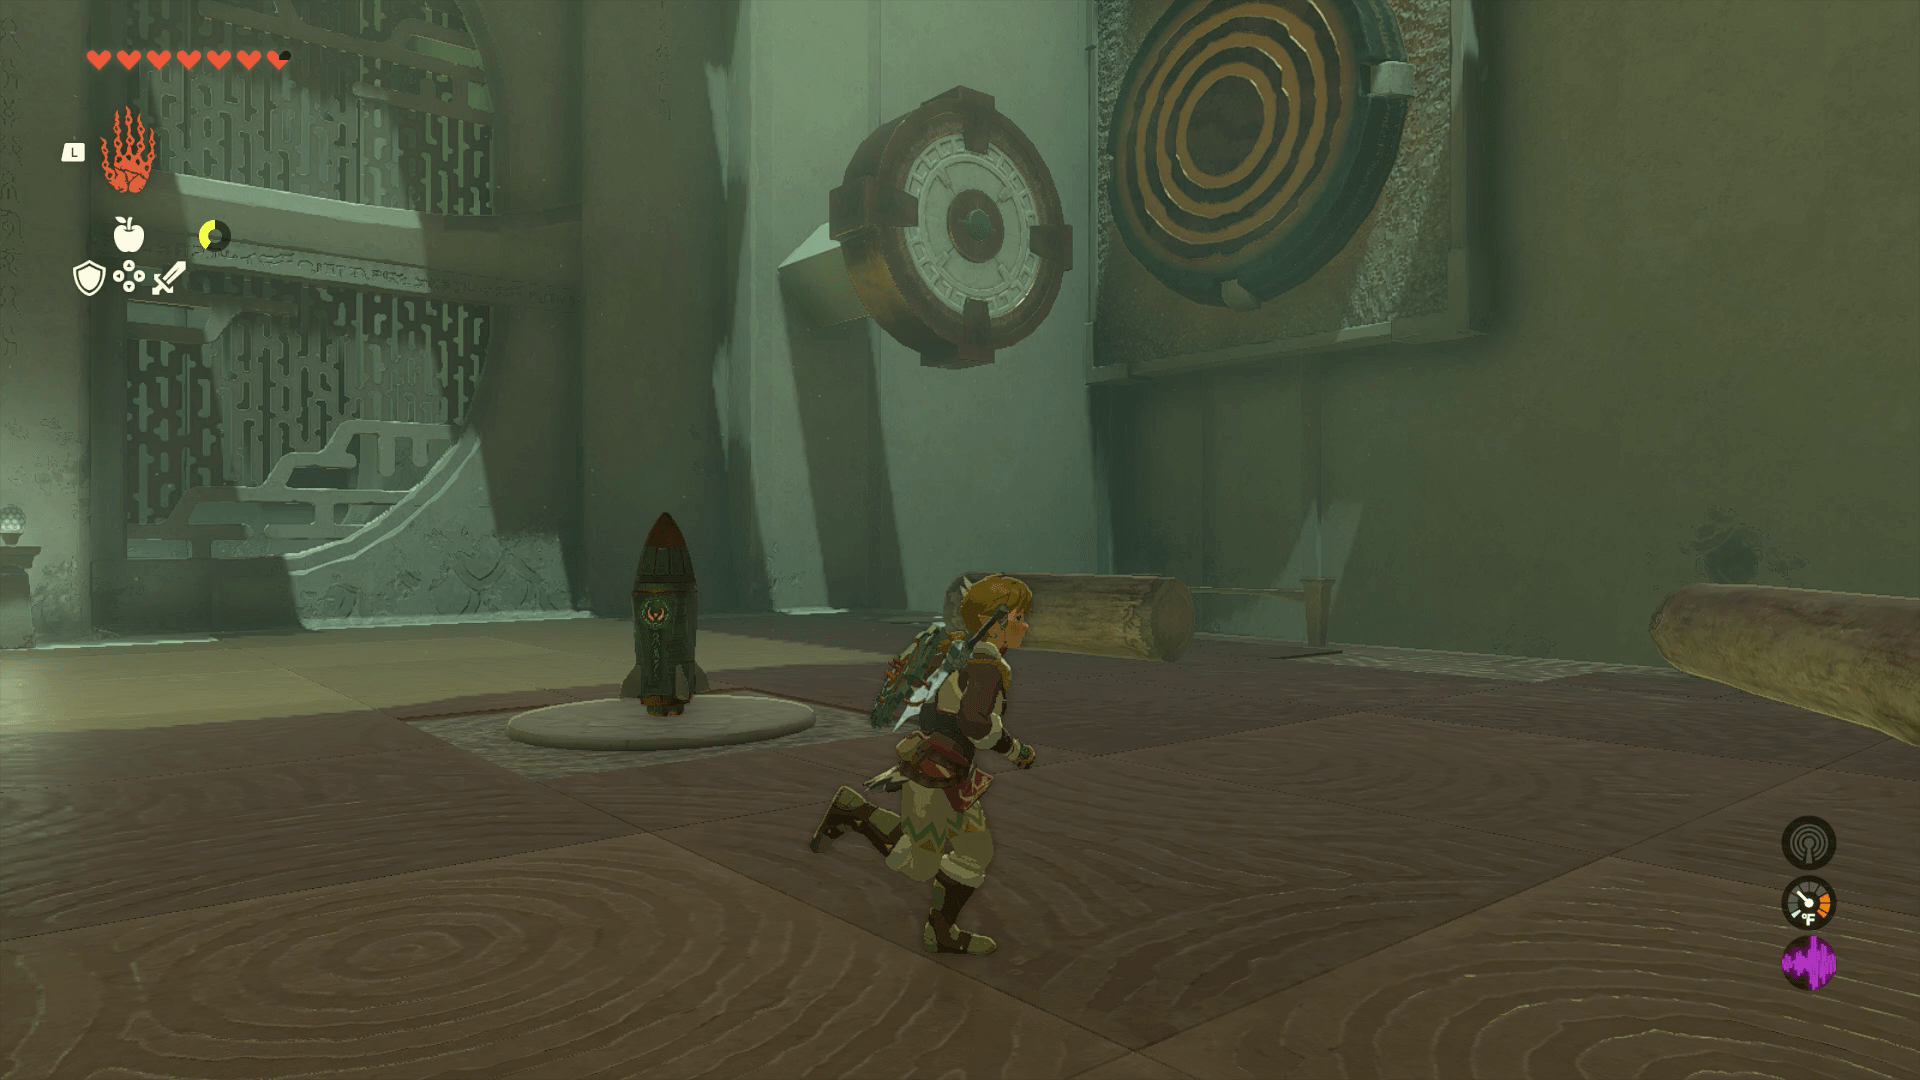
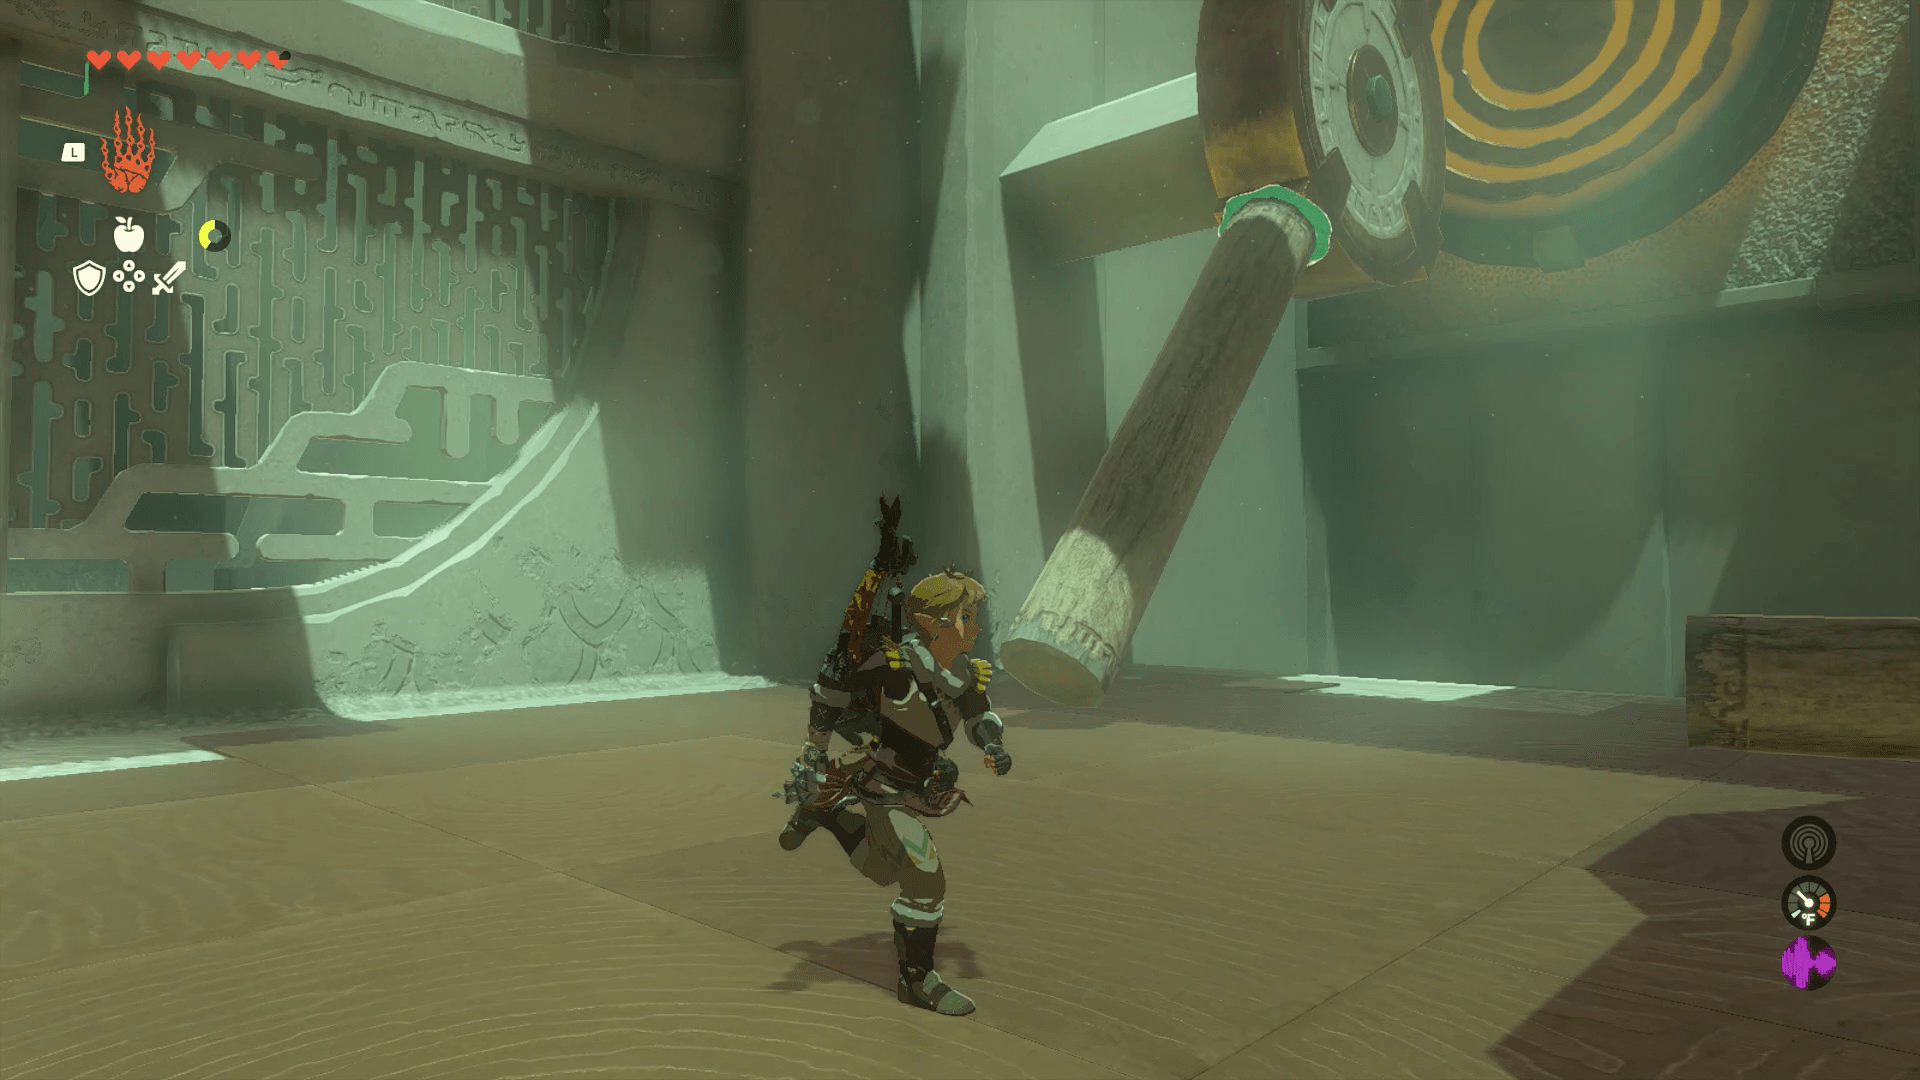
5. This next room has two more logs (one longer than the other), a rocket, and another big yellow target on the wall — as well as a huge, circular gear protruding from the wall adjacent to the target.
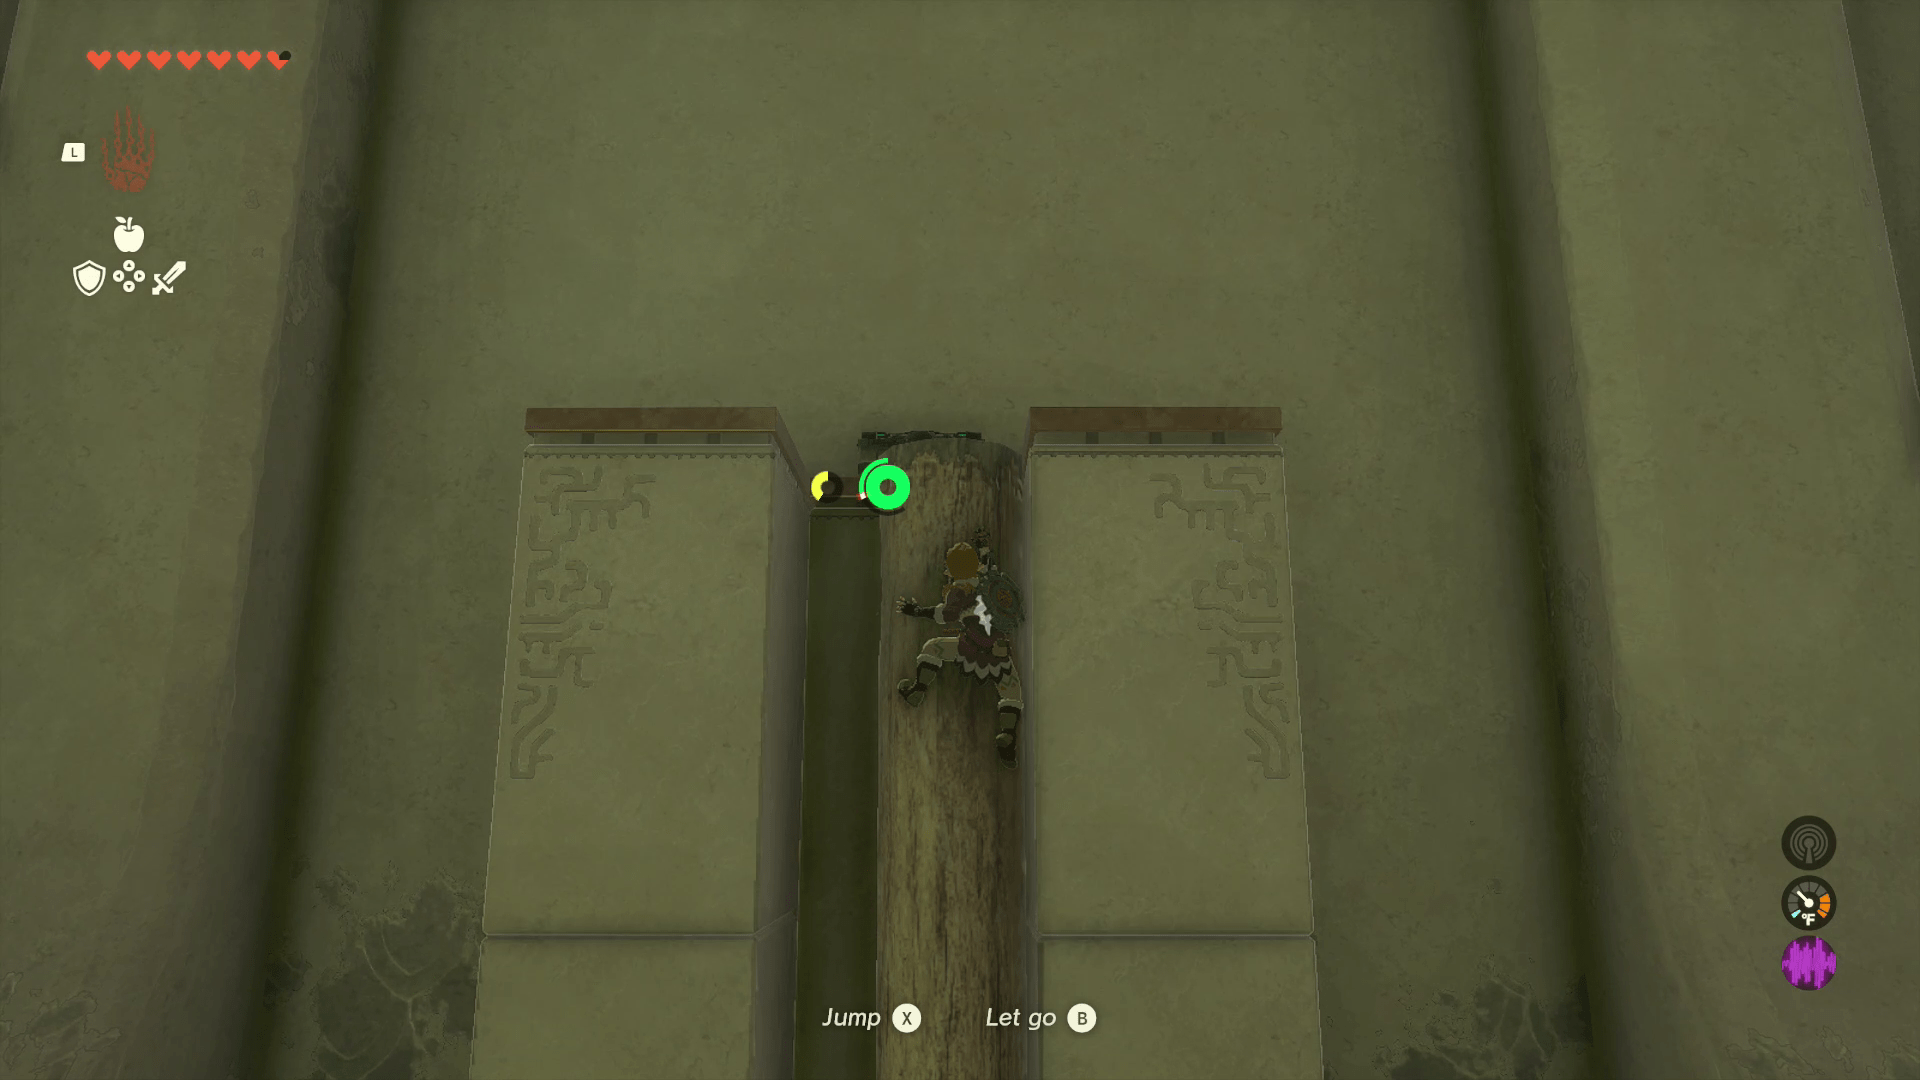
6. Behind you, there’s a treasure chest up on a high platform with a divot in it. Use Ultrahand on the longer of the two logs, and balance it in the divot. Climb up the log to get to the chest. Inside, you’ll find a Zonaite bow.
7. Hop off the platform. Using Ultrahand, attach the longer log to the side of the stone gear. The weight of the log will cause the gear to turn.
8. Time for more Ultrahand. Grab the smaller log and attach it to the end of the longer log at a perpendicular angle, like a little hammer. Or even a mallet ... for smashing!
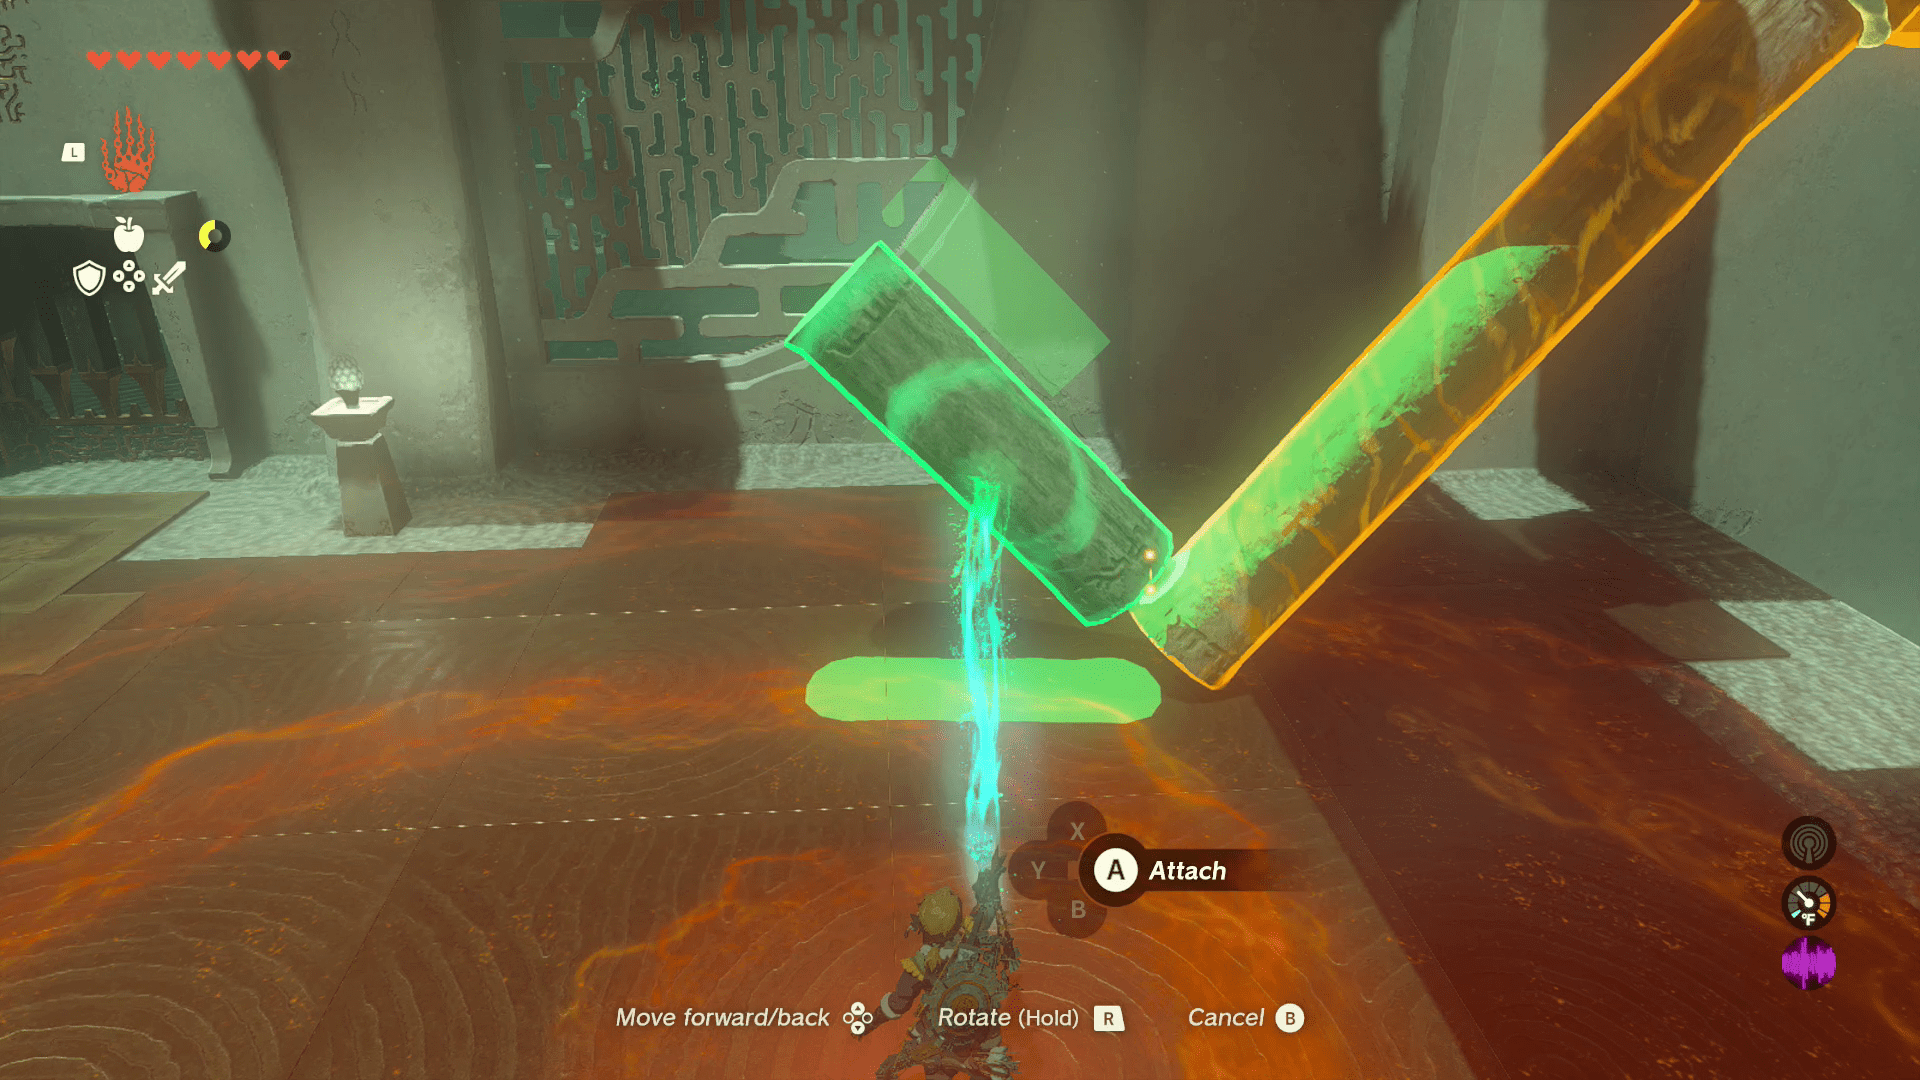
9. Last but not least, use Ultrahand to attach the rocket to the short log at the end of your hammer. Hit the rocket to light it, and watch your mallet do its job.
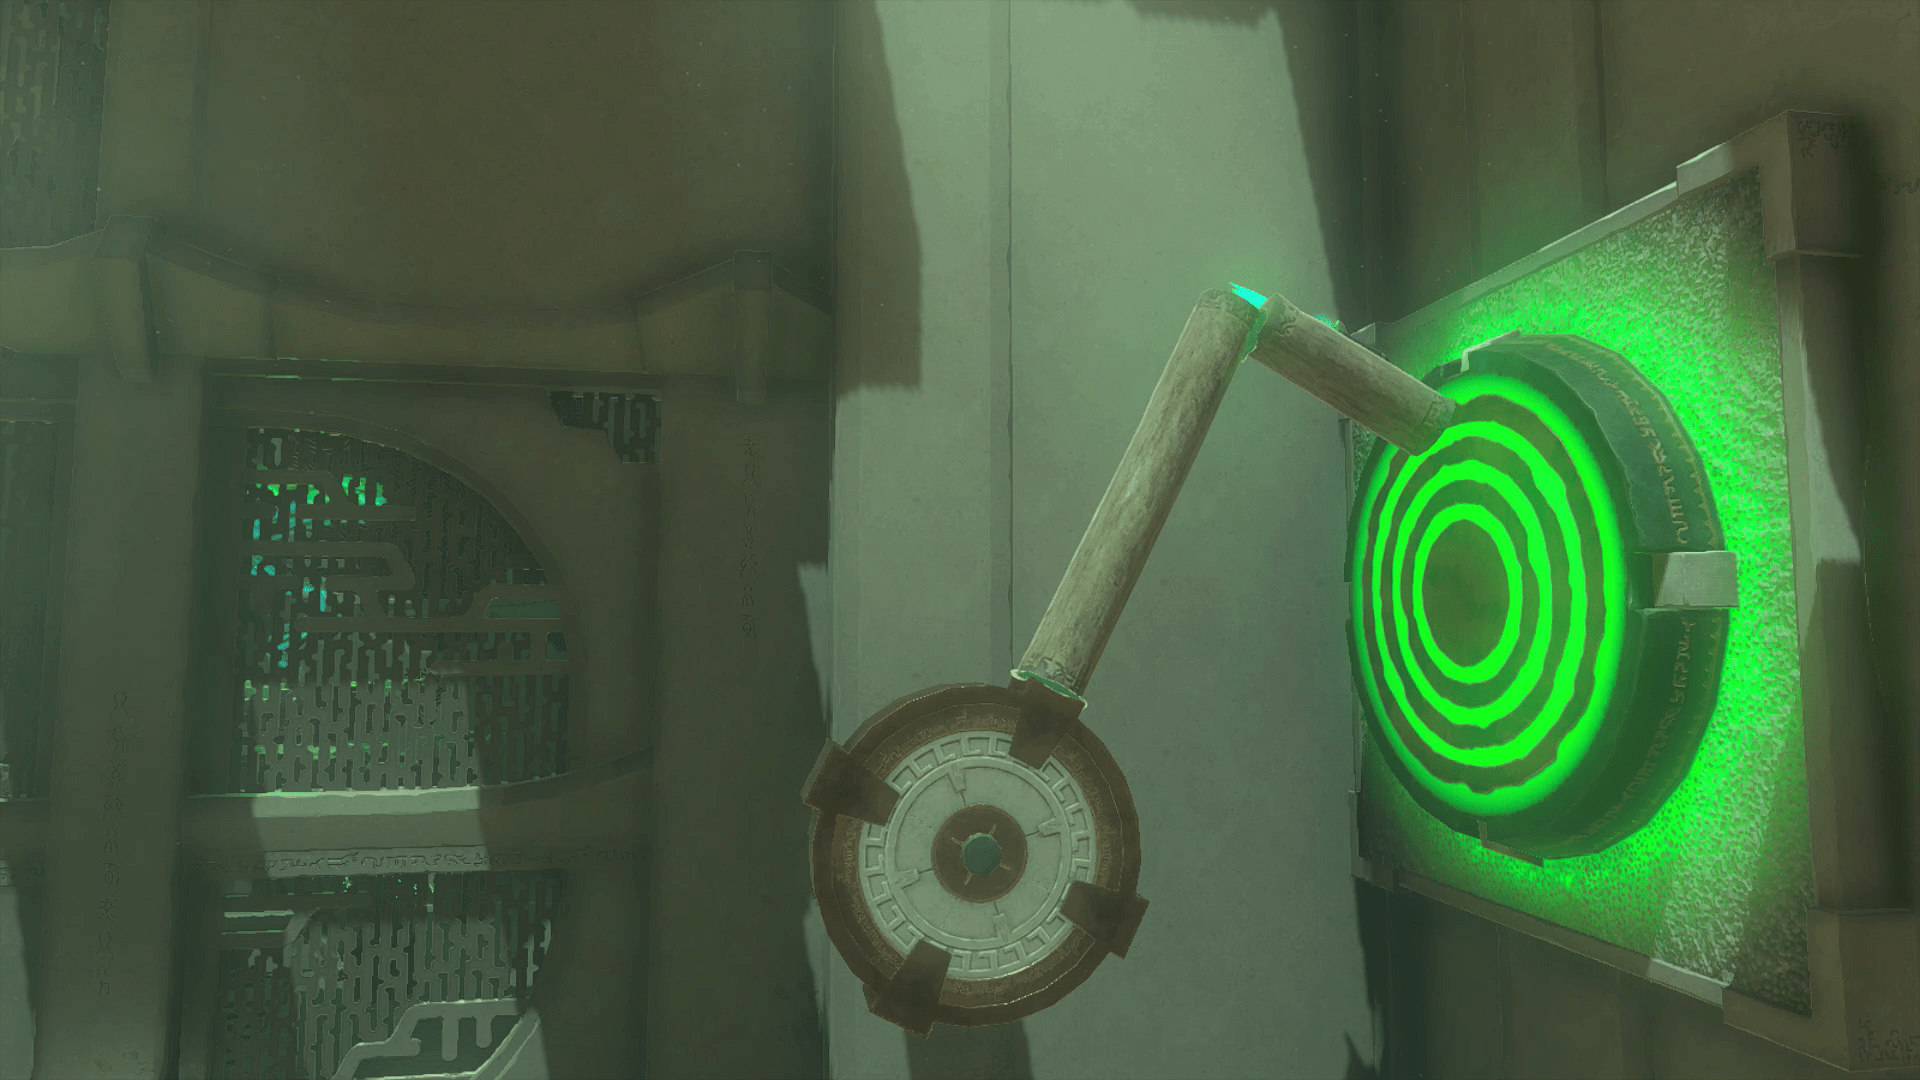
10. The gates at the back of the room will open. Head on in to interact with the sigil and claim your Light of Blessing.